Installing Linux Mint 21 Cinnamon (Clean Upgrade from Linux Mint 20) - Dual Bootwith Windows on Toshiba Dynabook R734/K
Linux Mint is one of most popular Linux distribution (also known as ‘distro’) known for its user and beginner friendly user interface, a good starting point from people new to GNU/Linux. On this post I am clean upgrading to Linux Mint 21 from v. 20, while also keeping the dual boot with Windows intact on my Dynabook R734/K laptop.
Nerdizen.xyz — Oh wow, Linux Mint 21 was finally coming! Linux Mint loved by its easy to install, easy to use Linux distro or operating system. In fact, Linux Mint was my first ever Linux distro, it means thanks to Linux Mint I am now a fan of Linux distro or operating system.
Several things changed in Linux Mint 21, mostly on system related so casual Linux user won’t have to deal it directly like upgraded PHP version, windows compositor, etc.
But there are also several changes in Linux Mint 21 on the user interface, most noticably is the redesign of built-in folder icons. Were you love the changes or not? Honestly, I kind of loved it, it looks refreshing 😁.
My environment:
- Linux Mint version: 21.
- Installed OS: Windows 8.1 and Linux Mint 20.3
- Media booting method: Ventoy.
- Device: Toshiba Dynabook R734/K – UEFI boot.
Steps installing Linux Mint 21, clean upgrade from v. 20 – dual boot with Windows (example on Dynabook R734/K laptop)
Booting Linux Mint 21 installation media
- Head to the official download page for Linux Mint at
linuxmint.com/download.phpand obtain the OS image (ISO). - Prepare the installation media for Linux Mint to create a bootable setup using the downloaded ISO image. (I am using Ventoy; you can find more details on the provided link above.)
- Note: If you are performing a clean upgrade, you can skip step 3, as you’ll be using the existing partition where the older version of Linux Mint (in my case v. 20) is installed. [Recommended] Create a new empty partition on your laptop’s hard drive dedicated to Linux Mint installation. Use Windows’ “Disk Info” tool for easy partitioning, aiming for around ±40 GB or more, and label it as “Linux Mint” for easy identification.
- Before starting the installation, disconnect all external devices, especially storage devices, to avoid potential formatting or erasing errors.
- Access the
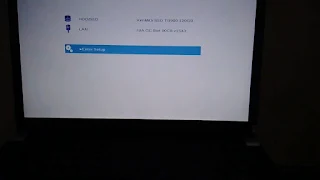
Boot Menu(BIOS menu) on Dynabook R734/K by restarting the laptop and repeatedly pressing F12 until the boot menu/BIOS menu appears. - If the Linux Mint installation/bootable media (e.g., USB storage stick) is not plugged in, do so now to make it appears in the BIOS Boot Menu.
- In the Boot Menu, select the installation/bootable media (e.g. USB drive) to boot into it directly. Alternatively, adjust the boot order to prioritize the installation/bootable media for automatic booting. Follow these steps:
- Choose
Enter Setupfrom the Boot Menu main menu.
- In the side menu, select
Advanced, scroll down, and chooseChange Boot Order.
- Set the USB drive (or your relevant storage) where the boot media of our Linux Mint image is located to the top of the Boot Priority Options and click
OK.
- Select
Exit→Exit Saving Changesfrom the side menu.
- Choose
- In the Ventoy boot main menu, consider switching to GRUB2 Mode for increased compatibility in booting Linux images by pressing Ctrl+R. Then, select the Linux Mint ISO image and press Enter to initiate the Linux Mint OS live media boot process.
Installing to the disk
Note: Make sure to backup our data and files since clean upgrading will erase all applications and files on our old installation of Linux Mint.
Steps:
- Now we are in Linux Mint 21 live image desktop environment, click
Install Linux Minton the desktop shortcut to start the installation wizard. - Select language and keyboard layout, click
Continuebutton on bottom right to confirm.
- Next whether to connect to network or not, I choose no (
I dont' want to connect...) as we can update our Linux Mint and drivers later after installation. ClickContinueto proceed.
- After that, whether to install multimedia codecs. Since or purpose is a desktop use and multimedia is important, so tick the
Install multimedia codecs...checkbox. HitProceedbutton on bottom right to continue.
- On the Installation type window, it will detect old Linux Mint installation. Since I want to clean upgrade to Linux Mint 21, so tick the choice of
Erase Linux Mint.... ClickInstall nowon bottom right to begin the installation of Linux Mint 21 which will erase and rewrite old Linux Mint installation.
- Choose time zone.

- Fill our login credentials for the desktop, especially username and password. Click
Continueon bottom right to proceed. - Done! Wait until the installing process done, and click
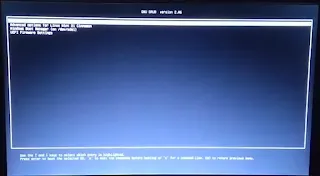
Restart nowto restart our PC/laptop and boot to Linux Mint GRUB menu, then selectLinux Mint 21...to boot the Linux Mint desktop.
If you want to know how I freshly installed Linux Mint (not clean upgrading like this) and also dual boot it with Windows, you can check on my older post here: Dual Booting Windows 10 & Linux Mint 20.x on Toshiba Dynabook R734/K. Although it’s Linux Mint version 20, the installer UI is still the same so it’s still relevant to this Linux Mint 21.


